Self-publishing your children’s book is exciting, but the printing process can feel like navigating a maze of confusing jargon and costly decisions. This guide cuts through the noise and gives you the exact steps to print a stunning, durable, and child-safe book that sells, without breaking the bank.
Children’s book printing success hinges on three key elements: precise color management using the CMYK color model (not RGB), selecting the appropriate paper stock (like 128gsm or 157gsm matte coated for picture books, or 2mm greyboard for board books), and choosing a durable, safe binding method (such as perfect binding for longer books or sturdy board book binding for toddlers). Crucially, all materials, especially inks, must comply with US safety standards like CPSIA and ASTM F963, ensuring they are non-toxic.
This is just the tip of the iceberg. We’ll dive deep into file preparation, cost-saving strategies, and how to effectively communicate with your printer to avoid common, costly mistakes. For a children’s book printing that meets all standards, and achieves high quality, read on.
Mastering Color: From Screen to Print
One of the biggest heartbreaks for an author is opening a box of newly printed books and finding the colors dull, muddy, or just wrong. This is often the result of a fundamental misunderstanding of color modes. Your computer screen uses RGB (Red, Green, Blue), a system for displaying colors with light. Children’s book printing, however, relies on CMYK (Cyan, Magenta, Yellow, Key/Black), a four-color process that uses ink.
The Critical Importance of CMYK

Think of RGB as projecting light, and CMYK as mixing paints. What looks brilliant on your screen won’t necessarily translate accurately to the printed page unless you design in CMYK from the very beginning. Imagine a vibrant, tropical rainforest scene designed in RGB. The lush greens and bright reds might look spectacular on your monitor. But when printed using CMYK without proper conversion, those greens can turn grayish, and the reds become muted.
Color Management Best Practices
Even with CMYK, what you see on your screen might not be exactly what you get in print. Why? Because every monitor displays colors slightly differently. That’s why monitor calibration is essential.
A calibration tool, like a Spyder or X-Rite, measures your monitor’s color output and creates a profile that corrects any discrepancies. These tools might seem like an added expense, but they’re a worthwhile investment, especially for full-color books.
And, after calibrating, never skip the proofing stage. A “soft proof” (a PDF on your screen) is helpful for checking layout and text, but it’s not a reliable indicator of color. Always request a hard proof – a physical print from your chosen printer. This is your chance to see the actual colors, paper stock, and finish before committing to a large print run. Examine the proof carefully under different lighting conditions.
Check for color accuracy, image sharpness, and any printing errors. A digital proof is faster and cheaper, often suitable for initial checks. A press proof, while more expensive, uses the actual printing plates and inks, providing the most accurate representation of the final product.
Paper Perfection: Choosing the Right Stock
Choosing the right paper for your children’s book is about more than just “thick” or “thin.” It’s about creating a complete sensory experience for your young readers. The feel of the paper, its weight, and even its subtle sheen all contribute to the overall impression.
Understanding Paper Types and Terminology

Let’s break down the common paper types you’ll encounter:
-
Coated Paper: This is the most popular choice for children’s books with colorful illustrations, and for good reason. The coating (a thin layer of clay or polymer) makes the surface smoother, resulting in sharper images and more vibrant colors. Think of it like applying a primer before painting a wall – it creates a better surface for the ink to adhere to.
- Gloss: A high-shine finish that makes colors pop. However, it can create glare, making it less ideal for text-heavy books.
- Matte/Dull: A non-glossy finish that reduces glare and provides a softer, more tactile feel. This is often the preferred choice for picture books, striking a balance between vibrancy and readability.
- Silk: A compromise is a finish that offers a little of the sheen of the Gloss without the excessive glare and reflection.
-
Uncoated Paper: As the name suggests, this paper lacks the coating. It has a more natural, textured feel and is typically used for books with more text and fewer illustrations, like chapter books for older children or activity books.
-
Specialty Paper: These are any type of paper that doesn’t fall under coated or uncoated, like textured, recycled, or synthetic. You need to know What Are the Different Types of Paper for Book Printing?
Understanding paper weight is also crucial. It’s measured in grams per square meter (gsm) in most of the world, and in pounds (lbs) in the US, learn more about basis weight. The higher the number, the thicker and heavier the paper. Here’s a general guide:
- Board Books (0-3 years): These require extremely durable paper, typically 2mm thick grayboard (approximately 350gsm x 2, often referred to as double-sided board). This is often laminated for extra protection against sticky fingers and enthusiastic chewing.
- Picture Books (4-8 years): 128gsm or 157gsm matte coated paper is a common and excellent choice, providing a good balance of durability and visual appeal.
- Chapter Books (9+ years): 80gsm, 100gsm, or 120gsm uncoated paper is often sufficient, especially if the book is primarily text.
Matching Paper to Age and Book Type
The age of your target audience should heavily influence your paper choice. Babies and toddlers need the indestructible nature of board books. Preschoolers need something sturdy but also visually engaging. Older children can handle thinner paper, but the quality should still reflect the value of the book.
The Feel Factor: Beyond Visuals
Remember, children interact with books in a very physical way. They touch, feel, and even sometimes smell the pages. The texture of the paper can significantly enhance the reading experience. A book about fluffy animals might benefit from a slightly textured paper that mimics the feel of fur.
Eco-Friendly Options
Many parents (and authors!) are increasingly concerned about sustainability. Choosing FSC-certified paper ensures that the paper comes from responsibly managed forests. Recycled paper is another option, although it can sometimes be slightly more expensive and may have a slightly lower brightness. You can proudly state your eco-conscious choice on the copyright page, adding value for environmentally aware readers.
Paper Cost Comparison Chart
| Paper Type | Applicable scene | Cost difference (compared to standard paper) |
|---|---|---|
| 100# Gloss Text | Full color illustration book | +0.15 |
| 128gsm matte paper | 4+ book pages | Base price |
| FSC certified paper | Cover only | +30%, replace the inner page with recycled paper to save 20% |
Binding Basics: Choosing the Right Finish
The binding holds your book together – literally! But it’s also a key element of the book’s overall design and durability. It’s the backbone of the book (pun intended!), and choosing the right binding is essential for both aesthetics and longevity.
Binding Types Explained

Let’s explore the most common binding options for children’s books:
- Saddle Stitch: This is the simplest and most economical method. Pages are folded in half and stapled together along the spine. It’s best for books with a lower page count (typically under 60-80 pages, and the page count must be a multiple of 4). A clear visual diagram helps understand.
- Perfect Binding (Softcover): This is the standard for most paperback books. Pages are glued together along the spine, creating a flat edge where the title can be printed. It’s suitable for books with a higher page count than saddle stitch (usually at least 32 pages, depending on paper thickness), providing a more professional look.
- Case Binding (Hardcover): This is the most durable and premium option. Pages are sewn together in sections, then glued to the cover boards. This creates a long-lasting book that can withstand heavy use. Ideal for keepsake books or those intended for libraries. There is a minimum page count, generally, at least 28 inner pages are needed.
- Spiral/Wire-O Binding: Metal or plastic coils are threaded through holes punched along the spine. This allows the book to lay completely flat, making it perfect for activity books, workbooks, or cookbooks. While durable, it’s generally not considered aesthetically suitable for traditional storybooks.
- Board Book Binding: Pages are printed on thick cardboard and glued together. Perfect for babies and toddlers. Before you decide which binding to use, read more about 10 Types of Book Binding.
As children’s author and illustrator Debbie Ridpath Ohi shared in a blog post about the creation of her book I’m Bored, the choice of binding can be influenced by the book’s format and intended use. Her book, designed with a 9″x9″ trim size and perfect binding, benefited from the square format, allowing for a wider canvas to enhance the visual humor.
Safety Considerations

Safety is paramount when it comes to children’s books.
- Round Corners: For board books and books intended for very young children, rounded corners are essential to prevent injuries.
- Saddle Stitch Wire: While cost-effective, the exposed staples in saddle-stitched books can pose a potential hazard. Consider “hidden staple” or “loop stitch” alternatives, or opt for perfect binding instead.
- Glue: Always confirm with your printer that they use non-toxic, CPSIA-compliant adhesive.
File Preparation: Avoiding Common Mistakes
You’ve chosen your colors, paper, and binding. Now, it’s time to prepare your digital files for the printer. This is where many independent authors stumble, leading to delays, extra costs, and frustrating results. Following these guidelines will help you avoid common pitfalls.
Image Resolution
This is arguably the most crucial aspect of file preparation. For print, your images must be at least 300 DPI (dots per inch) at the final printed size. Lower resolution images will look blurry and pixelated when printed, no matter how good they look on your screen.
This rule applies to all images, including illustrations, photographs, and background textures. Learn how to check and adjust image resolution in your design software (Photoshop, Illustrator, Canva, etc.). Provide links to tutorials if possible.
Bleed and Trim
Imagine a guillotine cutting your book’s pages to their final size. That’s essentially what the “trim” is – the final dimensions of your book. But what if your illustrations go right to the edge of the page? If you don’t provide “bleed,” you’ll end up with thin white lines along the edges where the cutter didn’t quite catch the ink.
- Bleed: This is extra image area that extends beyond the trim line, ensuring that your artwork goes all the way to the edge after cutting. The standard bleed is 3mm (0.125 inches) on all sides. For Hardcover books, the bleed is typically 20mm.
- Visual Example: Use a diagram showing a page with the trim line, bleed area, and safe area clearly marked.
- Trim Size: This is the final, finished size of your book after it’s been trimmed.
- Safe Area/Quiet Zone: Keep all important elements (text, key parts of illustrations) inside this area, well away from the trim line. A safe margin of at least 0.25 inches (6.35mm) is recommended, though 0.5 inches (12.7mm) is safer for perfect bound and hardcover books.
Fonts
Fonts can be tricky. To ensure your text prints correctly, you have two options:
- Embedding: This includes the font information within your PDF file. Most design software allows you to do this automatically when exporting.
- Outlining (Converting to Outlines/Curves): This turns your text into vector shapes, so the printer doesn’t need the actual font file. However, outlined text is no longer editable, so keep a separate, editable version of your file.
File Format
The industry standard for print-ready files is PDF/X-1a. This format ensures that all fonts are embedded, colors are in CMYK, and images are at the correct resolution. Most design software will have an option to export as PDF/X-1a.
File Preparation Checklist
Provide a downloadable checklist that summarizes all the file preparation steps:
- [ ] Images are 300 DPI at final print size.
- [ ] Color mode is CMYK.
- [ ] Bleed is set to 3mm (0.125 inches) on all sides (20mm for hardcover).
- [ ] All important elements are within the safe area.
- [ ] Fonts are either embedded or outlined.
- [ ] File is saved as PDF/X-1a.
Working with Your Printer: A Collaborative Partnership
Choosing the right printer is crucial, but it’s only the first step. Effective communication and a collaborative approach are essential for a successful project. Think of your printer not just as a service provider, but as a partner in bringing your book to life.
Choosing the Right Printer
You have two main options: online printers and local print shops. Online printers often offer competitive pricing and convenience, while local printers may provide more personalized service and the opportunity to see paper samples and proofs in person.
Key Questions to Ask a Printer:
Before committing to a printer, ask these crucial questions:
- What paper stocks do you offer that are suitable for children’s books? (Ask for samples!):
- What binding options do you recommend for my book’s page count and target audience?:
- What is your turnaround time?:
- What are your shipping costs and options?:
- What is your proofing process? (Digital proofs? Press proofs?):
- What is your minimum order quantity?:
- What are your payment terms?:
- Do you have experience printing children’s books? (Ask for references or examples.):
- Do your inks and materials meet safety standards (CPSIA, ASTM F963)? Crucially important!:
- What file format will you accept?:
Communication is Key
Clear and consistent communication is vital.
- Provide Clear Specifications: Don’t assume the printer understands your vision. Create a detailed “Printing Specifications Sheet” that includes all the details of your project: book size, page count, paper stock, binding type, colors (including any Pantone spot colors), special finishes, quantity, and delivery address.
- Understanding Printer Jargon: Familiarize yourself with common printing terms (bleed, trim, DPI, CMYK, etc.). If you’re unsure about something, ask!
- Be Responsive: Answer the printer’s questions promptly and thoroughly. Delays in communication can lead to delays in production.
- Maintain Records: Keep careful track of email. Consider using a dedicated “Communication Log”
Handling Issues:
Even with the best planning, things can sometimes go wrong. If you encounter a problem with the print job (color issues, binding errors, damaged books), contact your printer immediately. Be clear and specific about the issue, and provide photographic evidence if possible. A reputable printer will work with you to find a solution, whether it’s a reprint, a discount, or a refund.
Budgeting and Cost Optimization
Printing costs can vary widely depending on a number of factors:
- Paper Stock: Thicker, coated paper is more expensive than thinner, uncoated paper.
- Binding Type: Hardcover is the most expensive, followed by perfect binding, then saddle stitch.
- Color: Full-color printing is more expensive than black and white. Using spot colors adds to the cost.
- Quantity: The more books you print, the lower the per-unit cost (but be mindful of storage and distribution).
- Special Finishes: Embossing, foil stamping, spot UV, and other special finishes add to the cost.
- Shipping: Shipping costs can be significant, especially for heavy books.
Cost-Saving Tips:
- Choose Standard Sizes: Custom sizes often require special setup and can increase costs.
- Optimize Page Count: Can you reduce the page count without sacrificing content?
- Compare Quotes: Get quotes from multiple printers before making a decision.
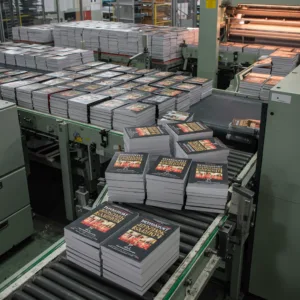
- Consider Print-on-Demand (POD): POD services like IngramSpark allow you to print books only as they are ordered, eliminating the need for large upfront print runs and inventory storage. This is great for testing the market.
Joanna Penn, a Bestselling Author, Speaker, and Entrepreneur on The Creative Penn, highlights this, saying “If you’re self-publishing a full-color children’s book…offset printing will likely offer the highest quality and best per-unit cost (assuming you print 1,000+ copies). However, using print-on-demand will probably be more affordable and carry less risk.”
Conclusion: Bringing Your Vision to Life
Printing your children’s book is a significant milestone in your self-publishing journey. It’s the moment your creative vision transforms from a digital file into a tangible object that children can hold, read, and cherish. By understanding the intricacies of color management, paper selection, binding options, file preparation, and communication with your printer, you’re empowering yourself to make informed decisions and avoid costly mistakes.
Ready to take the next step? Contact Mainland Printing today for a free consultation and quote. Let us help you bring your children’s book to life! We are here to help guide you, answer your questions, and provide the high-quality printing services your book deserves.